EF6 - Glimpse
Glimpse is a web debugging and diagnostics tool used to gain a better understanding of what's happening inside of your ASP.NET web application.
- It allows you to drill down into your app when you need to find out what's going on at the server.
- Glimpse provides so much valuable information we recommend you use it throughout your development cycle, including your Azure test environment.
Install EFE
Let's create a new application using the ASP.NET Web Application (.NET Framework) template and install Z.EntityFramework.Extensions.
Entity Framework Extensions (EFE) library is available as a NuGet package and you can install it using NuGet Package Manager.
In the Package Manager Console window, enter the following command.
PM> Install-Package Z.EntityFramework.Extensions
You can also install EFE by right-clicking on your project in Solution Explorer and selecting Manage NuGet Packages....

Search for Z.EntityFramework.Extensions and install the latest version by pressing the install button.
Install Glimpse
You can install Glimpse from the Package Manager Console and here we need to install Glimpse.MVC5 and Glimpse.EF6 packages by using the following commands.
PM> Install-Package Glimpse.MVC5
PM> Install-Package Glimpse.EF6
Enable Glimpse
By default, a glimpse is turned-off and to turn it on, run your application and go to the http://localhost:<port #>/glimpse.axd and click the Turn Glimpse On button.
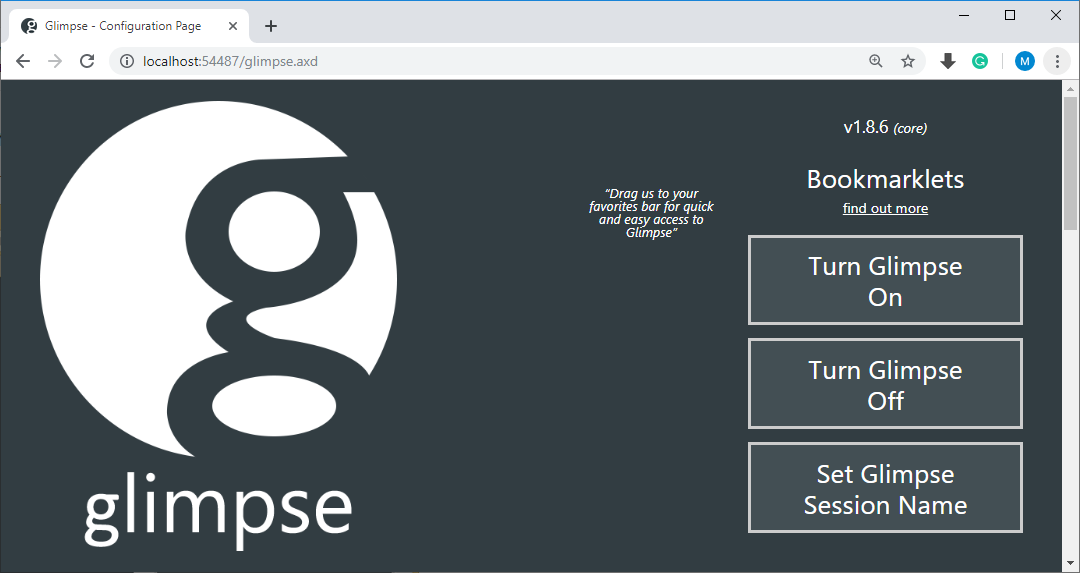
You are now ready to start your application.
Create Data Model
Model is a collection of classes to interact with the database.
- A model stores data that is retrieved according to the commands from the Controller and displayed in the View.
- It can also be used to manipulate the data to implement the business logic.
In the Models folder, add the following Author and Book classes.
public class Author
{
    public int AuthorId { get; set; }
    public string FirstName { get; set; }
    public string LastName { get; set; }
    public DateTime BirthDate { get; set; }
    public List<Book> Books { get; set; }
}

public class Book
{
    public int BookId { get; set; }
    public string Title { get; set; }
    public Author Author { get; set; }
}
There's a one-to-many relationship between Author and Book entities. In other words, an author can write any number of books, and a book can be written by only one author.
Create Database Context
The database context class provides the main functionality to coordinate Entity Framework with a given data model.
- You create this class by deriving from the
System.Data.Entity.DbContextclass. - In your code, you specify which entities are included in the data model.
- You can also customize certain Entity Framework behaviors.
So, let's create a folder DAL (Data Access Layer) in your project and create a new class file named BookStore.cs, and replace the following code.
public class BookStore : DbContext
{
    public BookStore() : base("BookStoreContext")
    {
    }

    public DbSet<Author> Authors { get; set; }
    public DbSet<Book> Books { get; set; }
}
This code creates a DbSet property for each entity set. In Entity Framework terminology, an entity set typically corresponds to a database table, and an entity corresponds to a row in the table.
Setup Database
The name of the connection string is passed into the constructor of the context class.
public BookStore() : base("BookStoreContext")
{
}
If you don't specify a connection string or the name of one explicitly, Entity Framework assumes that the connection string name is the same as the class name. The default connection string name in this example would then be BookStore, the same as what you're specifying explicitly.
Connection String
In this tutorial, we will be using LocalDB, so let's open the application Web.config file and add a connectionStrings element.
<connectionStrings>
  <add name="BookStoreContext" connectionString="Data Source=(localdb)\ProjectsV13;Initial Catalog=BookStoreDb;Integrated Security=True;" providerName="System.Data.SqlClient"/>
</connectionStrings>
The above connection string specifies that Entity Framework will use a LocalDB database named BookStoreDb.mdf.
Initialize Database
The default behavior is to create a database only if it doesn't exist and throw an exception if the model has changed and the database already exists.
- In this example, we will specify that the database should be dropped and re-created whenever the model changes.
- Dropping the database causes the loss of all your data.
- In a development environment, it is okay to drop and recreate the database, but in production, you generally don't want to lose all your data every time you need to change the database schema.
- You can write a Seed method that Entity Framework automatically calls after creating the database to populate it with test data.
In the DAL folder, add a new class BookStoreInitializer and replace the following code, which causes a database to be created when needed and loads test data into the new database.
using EFEWithGlimpse.Models;
using System;
using System.Collections.Generic;
using System.Data.Entity;
using System.Linq;
using System.Web;

namespace EFEWithGlimpse.DAL
{
    public class BookStoreInitializer : DropCreateDatabaseIfModelChanges<BookStore>
    {
        protected override void Seed(BookStore context)
        {
            var authors = new List<Author>
            {
                new Author { FirstName="Carson", LastName="Alexander", BirthDate = DateTime.Parse("1985-09-01")},
                new Author { FirstName="Meredith", LastName="Alonso", BirthDate = DateTime.Parse("1970-09-01")},
                new Author { FirstName="Arturo", LastName="Anand", BirthDate = DateTime.Parse("1963-09-01")},
                new Author { FirstName="Gytis", LastName="Barzdukas", BirthDate = DateTime.Parse("1988-09-01")},
                new Author { FirstName="Yan", LastName="Li", BirthDate = DateTime.Parse("2000-09-01")},
            };

            authors.ForEach(a => context.Authors.Add(a));
            context.SaveChanges();

            var books = new List<Book>
            {
                new Book { Title = "Introduction to Machine Learning", AuthorId = 1 },
                new Book { Title = "Advanced Topics in Machine Learning", AuthorId = 1 },
                new Book { Title = "Introduction to Computing", AuthorId = 1 },
                new Book { Title = "Introduction to Microeconomics", AuthorId = 2 },
                new Book { Title = "Calculus I", AuthorId = 3 },
                new Book { Title = "Calculus II", AuthorId = 3 },
                new Book { Title = "Trigonometry Basics", AuthorId = 4 },
                new Book { Title = "Special Topics in Trigonometry", AuthorId = 4 },
                new Book { Title = "Advanced Topics in Mathematics", AuthorId = 4 },
                new Book { Title = "Introduction to AI", AuthorId = 4 },
            };

            books.ForEach(b => context.Books.Add(b));
            context.SaveChanges();
        }
    }
}
The Seed method takes the database context object as an input parameter, and the code in the method uses that object to add new entities to the database.
To use your initializer class, add the contexts element to the entityFramework element in the application Web.config file.
<entityFramework>
  <contexts>
    <context type="EFEWithGlimpse.DAL.BookStore, EFEWithGlimpse">
      <databaseInitializer type="EFEWithGlimpse.DAL.BookStoreInitializer, EFEWithGlimpse" />
    </context>
  </contexts>
  <defaultConnectionFactory type="System.Data.Entity.Infrastructure.SqlConnectionFactory, EntityFramework" />
  <providers>
    <provider invariantName="System.Data.SqlClient" type="System.Data.Entity.SqlServer.SqlProviderServices, EntityFramework.SqlServer" />
  </providers>
</entityFramework>
The context type specifies the fully qualified context class name and its assembly, and the databaseinitializer type specifies the fully qualified name of the initializer class and its assembly.
Create Controller and Views
To create a controller, right-click the Controllers folder in Solution Explorer, and select Add > New Scaffolded Item...
- Select MVC 5 Controller with views, using Entity Framework, and then click Add button.
- In the Add Controller dialog box, select Author (EFEWithGlimpse.Models) from the Model class and BookStore (EFEWithGlimpse.DAL) from the Data context class dropdown.
- Enter AuthorController (not AuthorsController) as a Controller name and click Add button. The scaffolder creates an AuthorController.cs file and a set of views (.cshtml files) that work with the controller.
Setup Menu Options
Add menu entries for Authors
<!DOCTYPE html>
<html>
<head>
<meta charset="utf-8" />
<meta name="viewport" content="width=device-width, initial-scale=1.0">
<title>@ViewBag.Title - My ASP.NET Application</title>
@Styles.Render("~/Content/css")
@Scripts.Render("~/bundles/modernizr")
</head>
<body>
<div class="navbar navbar-inverse navbar-fixed-top">
<div class="container">
<div class="navbar-header">
<button type="button" class="navbar-toggle" data-toggle="collapse" data-target=".navbar-collapse">
<span class="icon-bar"></span>
<span class="icon-bar"></span>
<span class="icon-bar"></span>
</button>
@Html.ActionLink("Application name", "Index", "Home", new { area = "" }, new { @class = "navbar-brand" })
</div>
<div class="navbar-collapse collapse">
<ul class="nav navbar-nav">
<li>@Html.ActionLink("Home", "Index", "Home")</li>
<li>@Html.ActionLink("Authors", "Index", "Author")</li>
<li>@Html.ActionLink("About", "About", "Home")</li>
<li>@Html.ActionLink("Contact", "Contact", "Home")</li>
</ul>
</div>
</div>
</div>
<div class="container body-content">
@RenderBody()
<hr />
<footer>
<p>© @DateTime.Now.Year - My ASP.NET Application</p>
</footer>
</div>
@Scripts.Render("~/bundles/jquery")
@Scripts.Render("~/bundles/bootstrap")
@RenderSection("scripts", required: false)
</body>
</html>
Press Ctrl+F5 to run the project.
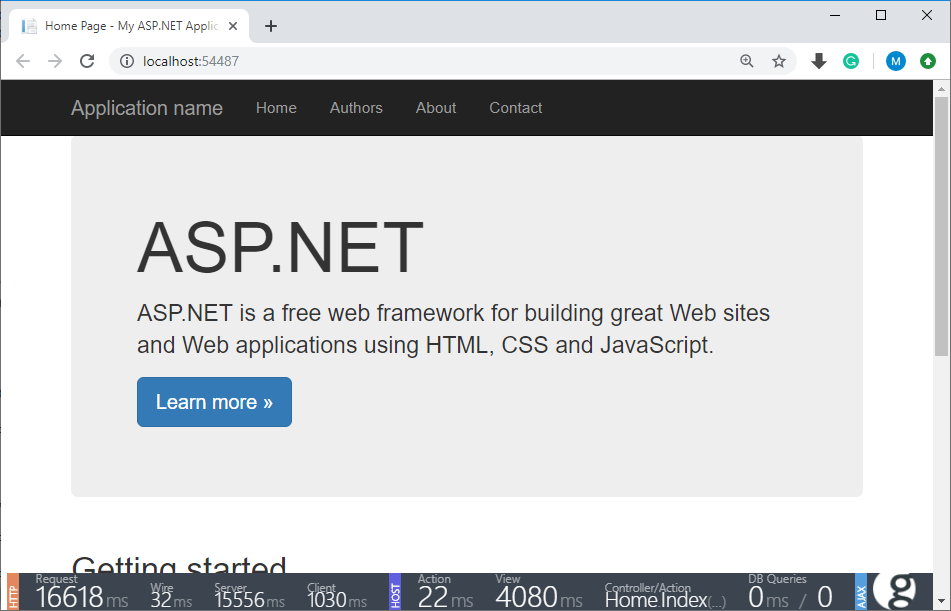
You can see the Heads Up Display (HUD) is shown at the bottom of the page which contains the details timing information. Clicking on the "g" in the lower right corner brings up the Glimpse panel.
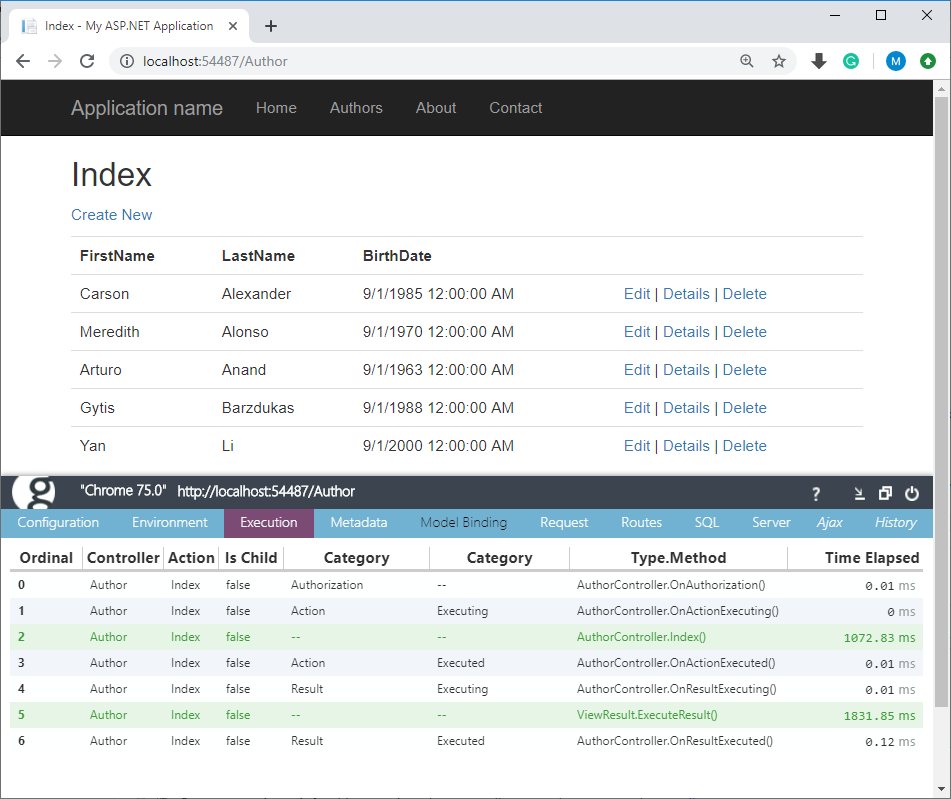
In the Execution tab, the timing details of the actions and filters in the pipeline are shown.
ZZZ Projects