EF6 - Entity Framework Profiler
Entity Framework Profiler is a real-time visual debugger which allows you to gain valuable insight and perspective of your Entity Framework usage.
Install EFE
Let's create a new application using the Console App (.NET Framework) template and install Z.EntityFramework.Extensions.
Entity Framework Extensions (EFE) library is available as a NuGet package and you can install it using NuGet Package Manager.
In the Package Manager Console window, enter the following command.
PM> Install-Package Z.EntityFramework.Extensions
You can also install EFE by right-clicking on your project in Solution Explorer and selecting Manage NuGet Packages....
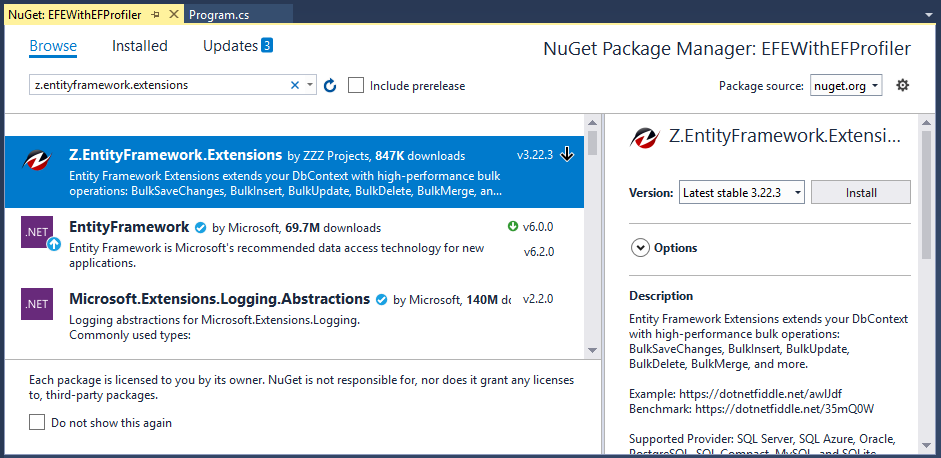
Search for Z.EntityFramework.Extensions and install the latest version by pressing the install button.
Register EF Provider
EF providers can be registered using either code-based configuration or in the application's config file, so let's open the App.config file.
<?xml version="1.0" encoding="utf-8"?>
<configuration>
  <configSections>
    <!-- For more information on Entity Framework configuration, visit https://go.microsoft.com/fwlink/?LinkID=237468 -->
    <section name="entityFramework" type="System.Data.Entity.Internal.ConfigFile.EntityFrameworkSection, EntityFramework, Version=6.0.0.0, Culture=neutral, PublicKeyToken=b77a5c561934e089" requirePermission="false" />
  </configSections>
  <startup>
    <supportedRuntime version="v4.0" sku=".NETFramework,Version=v4.7.2" />
  </startup>
  <entityFramework>
    <defaultConnectionFactory type="System.Data.Entity.Infrastructure.SqlConnectionFactory, EntityFramework" />
    <providers>
      <provider invariantName="System.Data.SqlClient" type="System.Data.Entity.SqlServer.SqlProviderServices, EntityFramework.SqlServer" />
    </providers>
  </entityFramework>
</configuration>
Note that often if the EF provider is installed from NuGet, then the NuGet package will automatically add this registration to the config file.
- The invariantName in this registration is the same invariant name used to identify an ADO.NET provider. The invariant name
System.Data.SqlClientis for SQL Server. - The type in this registration is the assembly-qualified name of the provider type that derives from
System.Data.Entity.Core.Common.DbProviderServices. For example, the stringSystem.Data.Entity.SqlServer.SqlProviderServices, EntityFramework.SqlServerhere is used for SQL Server.
Install Entity Framework Profiler
The first step is to download the latest version of Entity Framework Profiler application.
- Extract the zip file and open the ".\Profiler\EFProf.exe"
- It will require a license to use it, but for demo purposes, we can use the 30-days trial version of Entity Framework Profiler.
You can easily install the Entity Framework Profiler into your application from NuGet.
PM> Install-Package EntityFrameworkProfiler
It will install all the required binaries for the Entity Framework Profiler.
- Entity Framework Profiler is optimized to work with web applications and you will see that it has added App_Start folder in the solution explorer.
- To keep all these simple, delete the App_Start folder and also you will observe that one statement is added at the start of the Main method in Program class.
App_Start.EntityFrameworkProfilerBootstrapper.PreStart();
Remove this statement as well and just add a simple call Initialize() method as shown in the following code.
EntityFrameworkProfiler.Initialize();
You are now ready to start your application.
Create Data Model
The model is a collection of classes to interact with the database.
- A model stores data that is retrieved according to the commands from the Controller and displayed in the View.
- It can also be used to manipulate the data to implement the business logic.
To create a data model for our application, we will start with the following two entities.
public class Author
{
    public int AuthorId { get; set; }
    public string FirstName { get; set; }
    public string LastName { get; set; }
    public DateTime BirthDate { get; set; }
    public List<Book> Books { get; set; }
}

public class Book
{
    public int BookId { get; set; }
    public string Title { get; set; }
    public Author Author { get; set; }
}
There's a one-to-many relationship between Author and Book entities. In other words, an author can write any number of books, and a book can be written by only one author.
Create Database Context
The database context class provides the main functionality to coordinate Entity Framework with a given data model.
- You create this class by deriving from the
System.Data.Entity.DbContextclass. - In your code, you specify which entities are included in the data model.
- You can also customize certain Entity Framework behaviors.
So let's add a new BookStore class which will inherit the DbContext class.
public class BookStore : DbContext
{
    public BookStore() : base("BookStoreContext")
    {
    }

    public DbSet<Author> Authors { get; set; }
    public DbSet<Book> Books { get; set; }
}
This code creates a DbSet property for each entity set. In Entity Framework terminology, an entity set typically corresponds to a database table, and an entity corresponds to a row in the table.
Setup Database
The name of the connection string is passed into the constructor of the context class.
public BookStore() : base("BookStoreContext")
{
}
If you don't specify a connection string or the name of one explicitly, Entity Framework assumes that the connection string name is the same as the class name. The default connection string name in this example would then be BookStore.
Connection String
In this article, we will be using LocalDB, so let's open the application App.config file and add a connectionStrings element.
<connectionStrings>
  <add name="BookStoreContext" connectionString="Data Source=(localdb)\ProjectsV13;Initial Catalog=BookStoreDb;Integrated Security=True;" providerName="System.Data.SqlClient"/>
</connectionStrings>
The above connection string specifies that Entity Framework will use a LocalDB database named BookStoreDb.mdf.
Now, we are done with the required classes, so let's add some authors and book records to the database and then retrieve it.
using (var context = new BookStore())
{
    context.Database.Delete();

    var authors = new List<Author>
    {
        new Author
        {
            FirstName ="Carson",
            LastName ="Alexander",
            BirthDate = DateTime.Parse("1985-09-01"),
            Books = new List<Book>()
            {
                new Book { Title = "Introduction to Machine Learning"},
                new Book { Title = "Advanced Topics on Machine Learning"},
                new Book { Title = "Introduction to Computing"}
            }
        },
        new Author
        {
            FirstName ="Meredith",
            LastName ="Alonso",
            BirthDate = DateTime.Parse("1970-09-01"),
            Books = new List<Book>()
            {
                new Book { Title = "Introduction to Microeconomics"}
            }
        },
        new Author
        {
            FirstName ="Arturo",
            LastName ="Anand",
            BirthDate = DateTime.Parse("1963-09-01"),
            Books = new List<Book>()
            {
                new Book { Title = "Calculus I"},
                new Book { Title = "Calculus II"}
            }
        }
    };

    //IncludeGraph allows you to INSERT/UPDATE/MERGE entities by including the child entities graph.
    context.BulkInsert(authors, options => options.IncludeGraph = true );
}

using (var context = new BookStore())
{
    var list = context.Authors
        .Include(a => a.Books)
        .ToList();

    foreach (var author in list)
    {
        Console.WriteLine(author.FirstName + " " + author.LastName);

        foreach (var book in author.Books)
        {
            Console.WriteLine("\t" + book.Title);
        }
    }
}
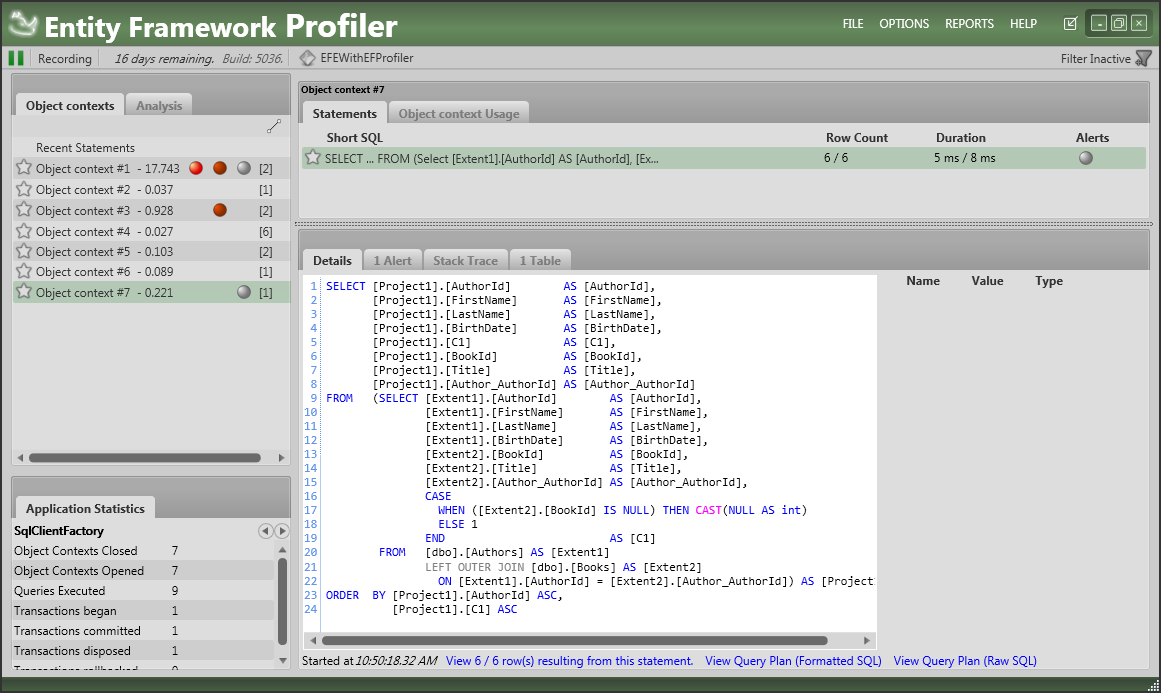
Now when you run the application, it's going to send data over to the Entity Framework Profiler application.
ZZZ Projects